
Authentic Hyderabadi Biryani Recipe: Step-by-Step Guide
Introduction to Hyderabadi Biryani
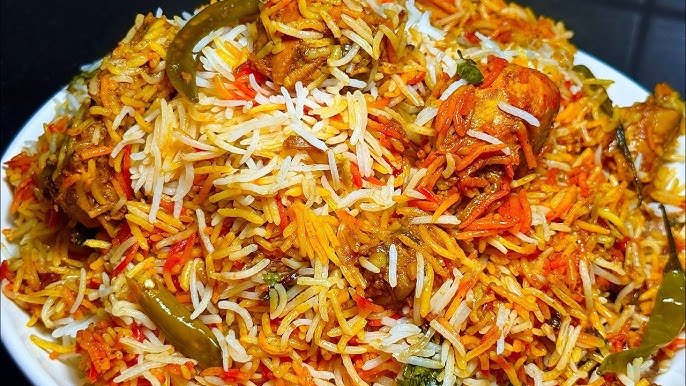
Hyderabadi Biryani isn’t just food—it’s a celebration of taste, tradition, and aroma. This dish originated from the kitchens of the Nizams of Hyderabad and has since become a cherished culinary gem across India and the world. Made with fragrant basmati rice, succulent meat, and a harmony of bold spices, it’s a meal that brings people together.
Origin and Cultural Significance
Hyderabadi Biryani has deep roots in Mughlai and Iranian influences. It evolved over centuries, combining Persian cooking methods with local Deccan flavors. Traditionally, it was served during royal feasts, symbolizing hospitality, grandeur, and cultural fusion.
Why It’s Loved Worldwide
Its universal appeal lies in the balance of spices, texture of perfectly cooked rice, and juicy, marinated meat. Whether served at weddings or weekend family meals, Hyderabadi Biryani never fails to impress.
Types of Hyderabadi Biryani
Kacchi vs Pakki Biryani
Kacchi Biryani involves marinating raw meat and layering it with half-cooked rice, then cooking everything together.
Pakki Biryani uses pre-cooked meat and rice, layered and steamed together to finish.
Both styles offer rich flavors, but Kacchi Biryani requires more precision.
Vegetarian Variants
While traditionally made with mutton or chicken, vegetarian versions like Paneer Biryani and Hyderabadi Veg Dum Biryani are popular with non-meat eaters, retaining the same dum cooking technique and spices.
Essential Ingredients Overview
Basmati Rice Selection
The soul of biryani lies in long-grain, aged basmati rice that remains fluffy after cooking. Look for rice aged over 1 year.
Meat Cuts and Marination Essentials
Bone-in goat or chicken thighs work best. Marination includes:
Yogurt
Ginger-garlic paste
Red chili powder
Turmeric
Salt
Fried onions (birista)
Lemon juice
Signature Spices Used
Green cardamom
Cloves
Cinnamon
Bay leaves
Mace (javitri)
Star anise
Nutmeg (optional)
Kitchen Tools You’ll Need
Traditional vs Modern Equipment
Traditional: Heavy-bottomed copper or clay pot with lid (handi).
Modern: Thick non-stick or cast-iron pot with a tight-fitting lid.
Must-Have Utensils
Slotted spoon for rice
Mixing bowls
Pestle & mortar or spice grinder
Dum seal (flour dough)
How to Choose the Right Rice
Basmati Quality and Soaking Time
Use premium, long-grain basmati. Soak for at least 30 minutes before boiling. This ensures even cooking and elongation of the grains.
Tips to Prevent Sticky Rice
Use ample water when boiling.
Add a dash of vinegar or lemon juice.
Cook until 70% done before layering.
The Perfect Meat Marinade
Authentic Marination Ingredients
Mix the meat with:
1 cup thick yogurt
2 tbsp ginger-garlic paste
1 tsp turmeric
1 tsp red chili powder
2 tsp salt
1 tbsp lemon juice
1 cup fried onions
Fresh mint and coriander
Duration for Deep Flavor
Marinate overnight or for a minimum of 4 hours. This breaks down the proteins and allows the flavors to penetrate the meat.
Making the Biryani Masala
Dry vs Wet Spice Mix
Dry mix: Includes garam masala, ground spices.
Wet mix: Onion-tomato base with spices sautéed in ghee.
Homemade Garam Masala Tips
Roast whole spices lightly before grinding for a fresher, deeper flavor.
Step-by-Step Cooking Process
Preparing the Meat Base
Place marinated meat at the bottom of the cooking pot. If using pakki style, cook the meat until tender first.
Layering the Biryani
Layer half-cooked rice over the meat. Add:
Saffron milk (saffron strands soaked in warm milk)
Ghee
Fried onions
Chopped herbs
Repeat layers as needed.
Dum Cooking Method Explained
Seal the pot with flour dough and cook on:
High heat for 10 minutes
Low heat for 30-35 minutes
Place a tawa (griddle) underneath the pot to avoid direct heat contact.
How to Layer Hyderabadi Biryani
Rice & Meat Ratio
Follow a 1:1.5 ratio of meat to rice for balance. Too much rice will dilute the flavor.
Saffron Milk, Fried Onions, and Ghee Layers
These ingredients not only boost flavor but also create a visual appeal with vibrant golden and brown hues.
Dum Cooking Technique (Sealing & Cooking)
Sealing the Pot (Dough Method)
Use wheat flour dough to seal the lid tightly, trapping the steam (dum) inside.
Heat Control & Timing
Keep a close eye to prevent burning. The aroma escaping from the edges signals it’s ready.
Serving Suggestions
What to Serve with Hyderabadi Biryani
Mirchi ka Salan (green chili curry)
Raita (yogurt with cucumber/onion)
Lime wedges and sliced onions
Presentation Tips for Guests
Serve in a clay pot or brass handi for a royal feel. Garnish with fried onions, coriander, and saffron strands.
Storage & Reheating Tips
How to Store Without Losing Aroma
Refrigerate in an airtight container. Add a few drops of ghee before reheating.
Reheating Without Drying It Out
Sprinkle a little water, cover, and heat on a low flame or in a microwave with a damp cloth cover.
Common Mistakes to Avoid
Don’t overboil rice—it’ll turn mushy.
Avoid excess water during marination.
Don’t open the lid while dum is happening—let the steam work its magic.
Nutritional Value Breakdown
| Nutrient | Approx. Value (per serving) |
|---|---|
| Calories | 580-650 kcal |
| Protein | 22-30g |
| Carbohydrates | 65-75g |
| Fats | 25-30g |
| Fiber | 2-4g |
Tips from Chefs
Add kewra water for a distinct aroma.
Use ghee, not oil, for richer flavor.
Layer with rose water for an exotic touch.
Frequently Asked Questions (FAQs)
1. Can I use chicken instead of mutton in Hyderabadi Biryani?
Yes, chicken is a popular alternative. Adjust cooking times accordingly.
2. What makes Hyderabadi Biryani different from other biryanis?
The dum cooking style, use of fried onions, and aromatic layering set it apart.
3. Can I make it in a pressure cooker?
Yes, but reduce dum cooking time and avoid over-pressurizing to prevent soggy rice.
4. Is Hyderabadi Biryani spicy?
Moderately. You can adjust spice levels to taste by reducing chili powder and green chilies.
5. How long does it take to cook?
Prep: 45 mins, Cooking: 45 mins – Total approx. 90 minutes.
6. Can I freeze leftover biryani?
Yes, freeze in small batches. Thaw and reheat gently on a stovetop or microwave.
Conclusion & Final Thoughts
Making Hyderabadi Biryani is an art that combines tradition, patience, and love. This recipe offers a genuine taste of Hyderabad’s royal kitchens right in your home. Whether for a celebration or a cozy family dinner, this flavorful masterpiece never fails to delight.